Database upgrades to the higher version or most recent version are common nowadays to get the most from the new features available in the higher/latest version. In this article, we will share the steps to upgrade SQL Server 2012 to 2019. You can upgrade SQL Server using the following methods.
- Using the in-place upgrade method
- Using the Data Migration Assistant (DMA) tool
- Using the Backup/restore method
For this article, we will use the in-place upgrade method. In this method, we will use SQL Server setup files to upgrade the SQL Server to the higher version. As we are planning to upgrade SQL 2012 to 2019 so we will have to use the setup file of SQL Server 2019.
You cannot proceed with the upgrade process if the above requirements are not met. If your SQL Server is running on old operating system, we recommend to upgrade/migrate the OS to a latest version (depends on the SQL version compatibility) as well.
SQL Server upgrades and SQL Server patches are two different concepts. In SQL Server upgrade process, complete version of the SQL Server is upgraded, for example from SQL 2016 to SQL 2017 etc. While in SQL Server patching, latest hotfixes or cumulative updates are applied to the current version of the SQL Server. To learn more about SQL Server patching and how to apply SQL patches, read this article.
SQL Server Upgrade checklist
Below mentioned are the SQL Server upgrade checklist. It is always a better idea to check the points mentioned below.
- Before Upgrading, check the system requirements for a particular SQL Server edition.
- Make sure; your current SQL Server is eligible for the upgrade. Check the Supported version for SQL Server 2019.
- Enable Windows authentication for SQL agent and confirm that the service account used for SQL Server agent has sysadmin permission.
- Confirm that there is no pending reboot
- Confirm that the Windows Installer service is running
Please note that during the SQL Server update process, we cannot add new features. If you need new features as well then you can run the SQL Server 2019 setup again and select the required features to install. It is always a good idea to take the full backup of all the databases before the upgrade.
It is not compulsory but it is a good idea to use Data Migration Assistant (DMA) tool before the upgrade on the current SQL Server databases to highlight any potential issues that might create problems during the upgrade process. You can resolve the issues found by Data Migration Assistant (DMA) and then start the SQL Server upgrade.
Steps to Upgrade SQL Server 2012 to 2019
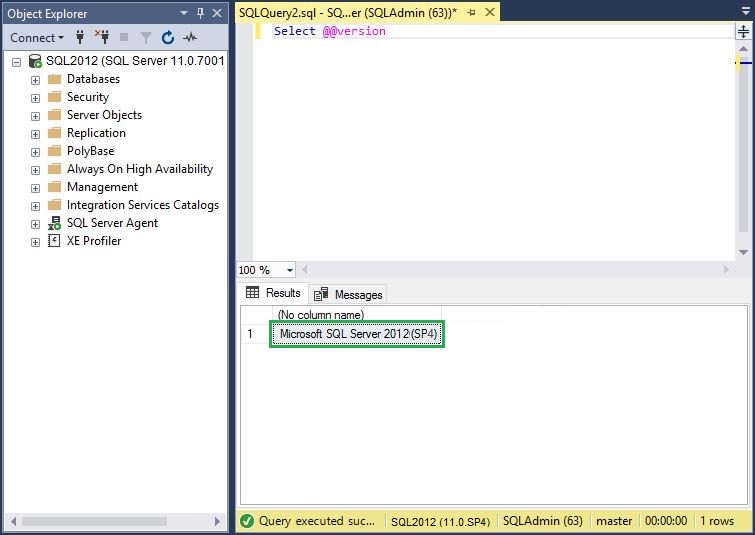
For this article, we will execute the SQL upgrade steps on SQL Instance SQL2012, and its current version is SQL Server 2012 SP4 enterprise edition as shown in the below screenshot.
Below mentioned are the steps for an in-place upgrade from SQL Server 2012 to 2019.
- Log in to the server machine as an administrator or with the user having local admin permission.
- Run the SQL Server 2019 setup file as an administrator. A new wizard will show up like the one shown below.
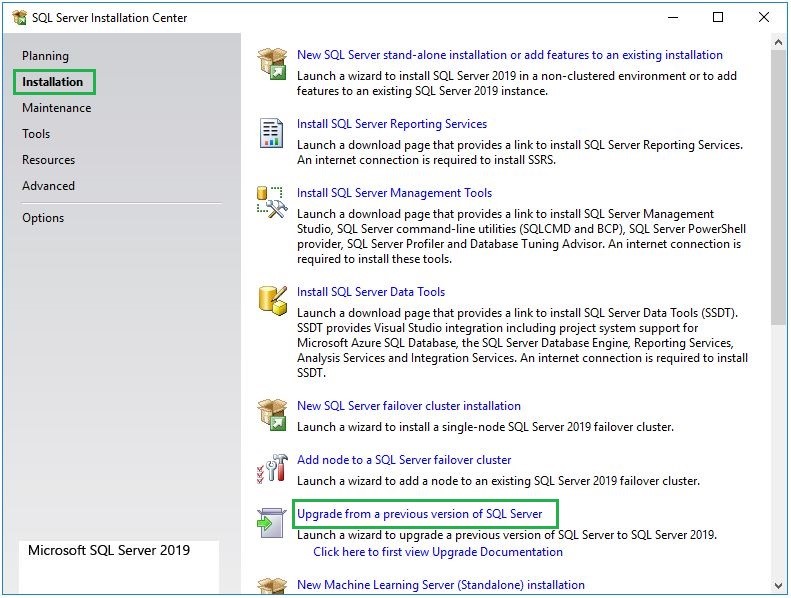
3. Click on the Installation, and then click Upgrade from a previous version of SQL Server as highlighted in the above screenshot. A new wizard will appear like the below:
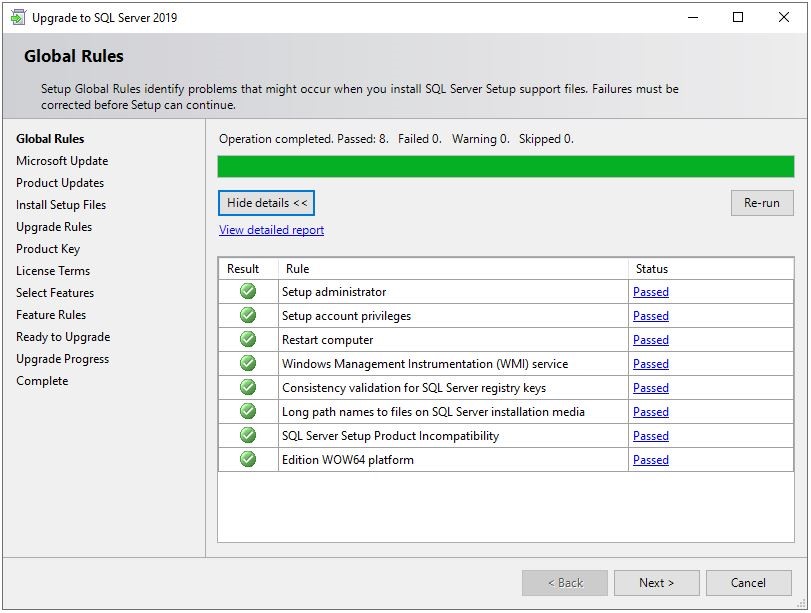
4. In this step, SQL Server update wizard will perform different checks to confirm the possibility of any potential problems occur during the upgrade of the SQL Server from 2012 to 2019. You can click on the Show details >> button to view the details of the checks performed. The checks that failed are shown with a red icon. All the successful checks will be displayed with a green icon on the Global Rules page as shown in the above screenshot.
When all the checks are pass, the wizard will automatically go to the next screen. But if you want to see the details of the checks performed, you can click on the Back button to see the details.
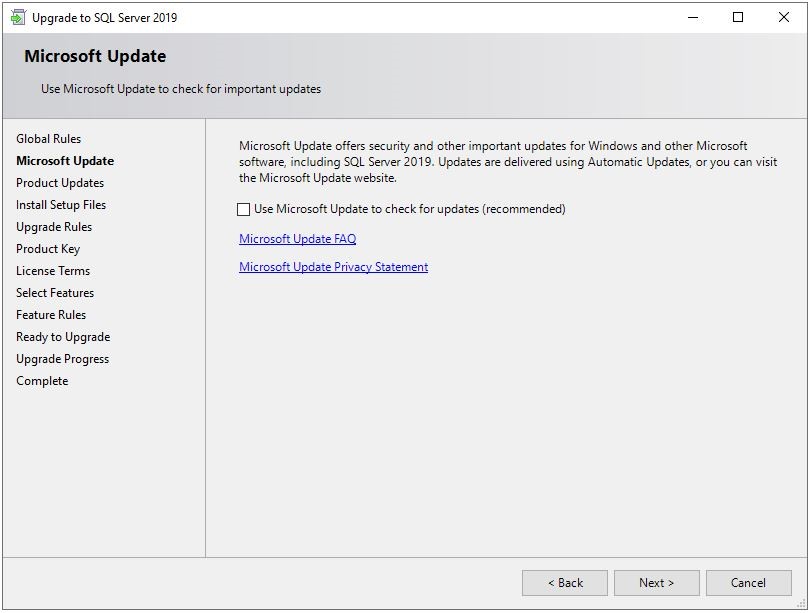
5. On the Microsoft Update screen, you will find a checkbox naming ‘Use Microsoft Update to check for updates’ to check for new updates online. If you do not want to check for updates, then leave it unchecked and click Next button. But when you select the checkbox, the product updates page will appear to download new updates.
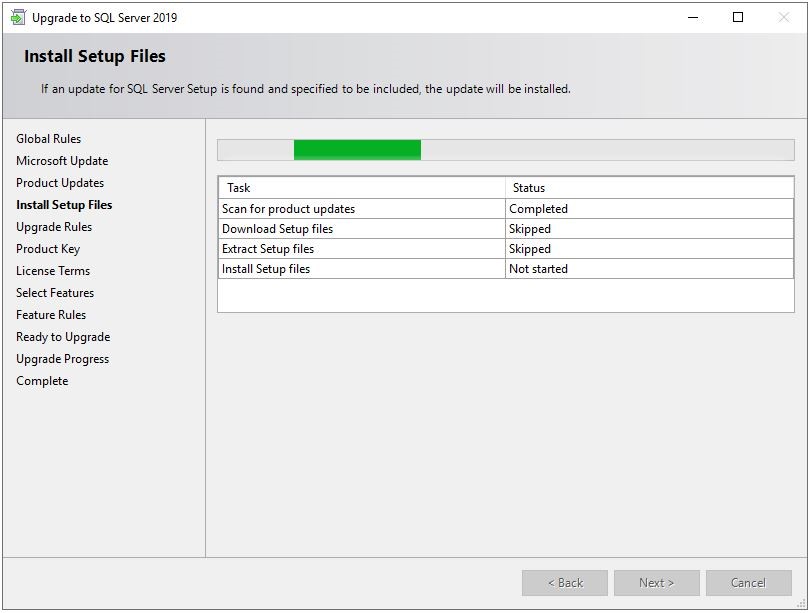
6. The purpose of the Install Setup files screen is to install any downloaded files. But since we did not select the Microsoft update checkbox on the previous screen, so the upgrade wizard will skip the ‘download setup files’ task and the upgrade wizard will go to the next screen shown below.
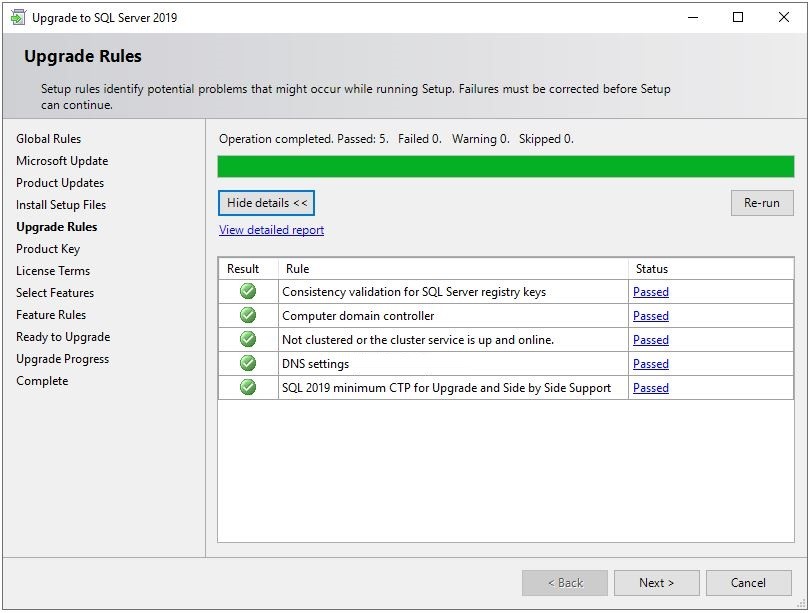
7. On this screen, the SQL upgrade will perform different checks regarding the SQL Server Upgrade to 2019. These rules are important for the upgrade and must be passed to proceed with the upgrade process. All the checks performed will have an icon like a Green icon means the rule is passed and a red icon means that the rule check is failed. After you fix the red icons, you can run these rules again by clicking on the Re-run. Click on the Next button to move to the next step.
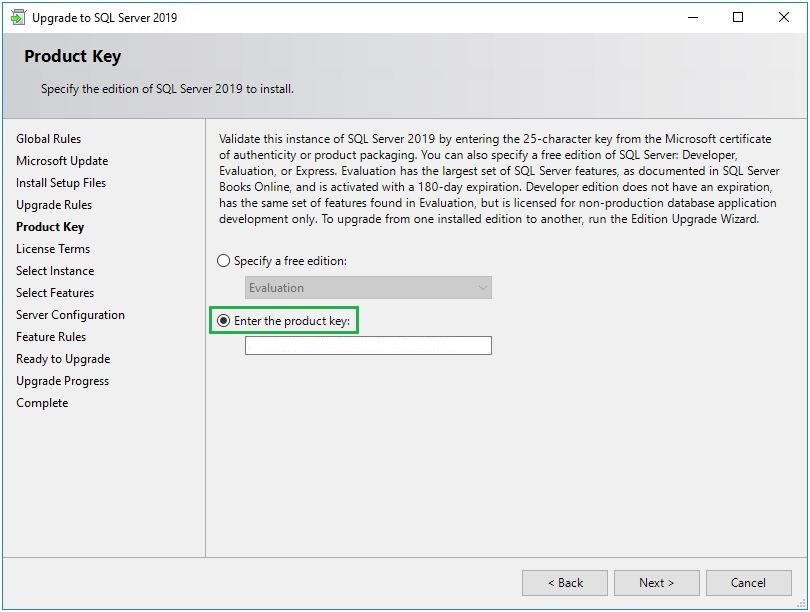
8. Click on Enter the product key option. Enter the product key here if it is not appear automatically, and click the Next button.
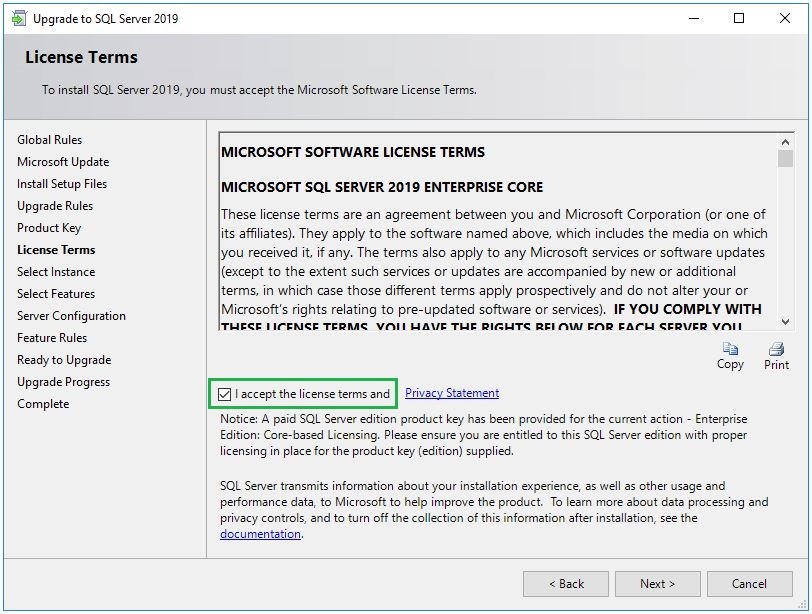
9. Click on the checkbox I accept the license terms and click the Next Button.
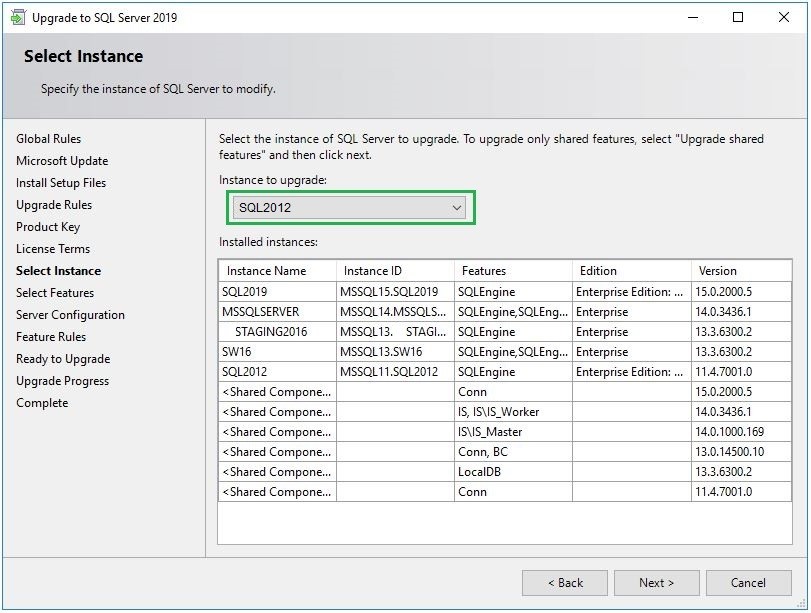
10. At this step, You need to select the SQL Server Instance that you want to upgrade, as we are upgrading the SQL Server Instance SQL2012 to SQL Server 2019, So we will choose SQL2012 in the Instance to upgrade section as shown in the above screenshot.
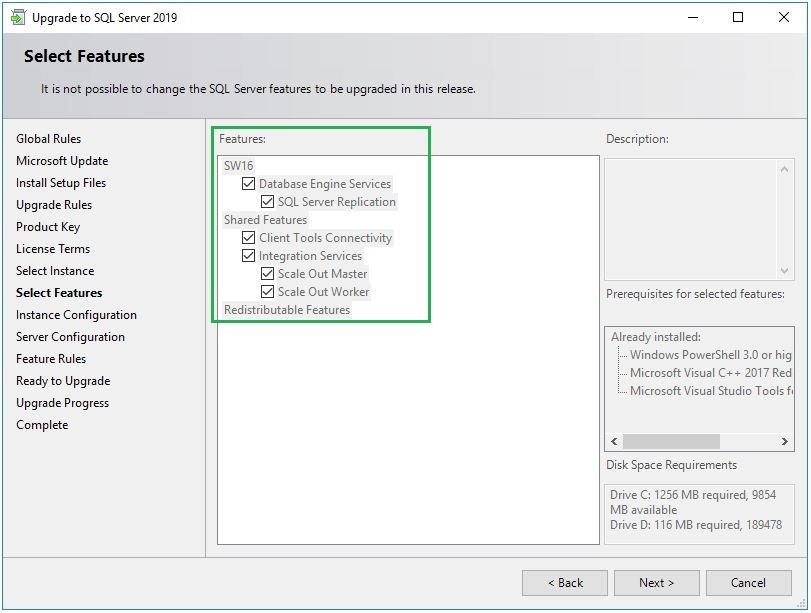
11. The Select feature page will show all the features that need to upgrade. By default, SQL Server features are selected. Click the Next button to see the next screen.
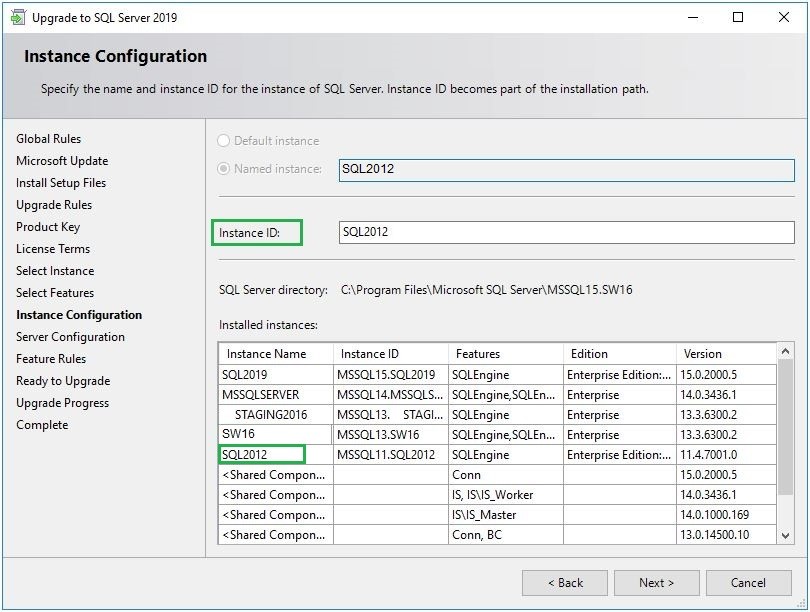
12. The Instance Configuration page will show the name and instance ID of the SQL Server instance. As we are upgrading from SQL 2012 to SQL 2019 and we are not performing any new SQL installation, so we do not need to change any value. The SQL Server instance SQL2012 will be selected by default. Click Next to move to the next Page.
13. On the Server Configuration screen, you will see the service accounts already in use. Click Next to show the Ready to upgrade screen.
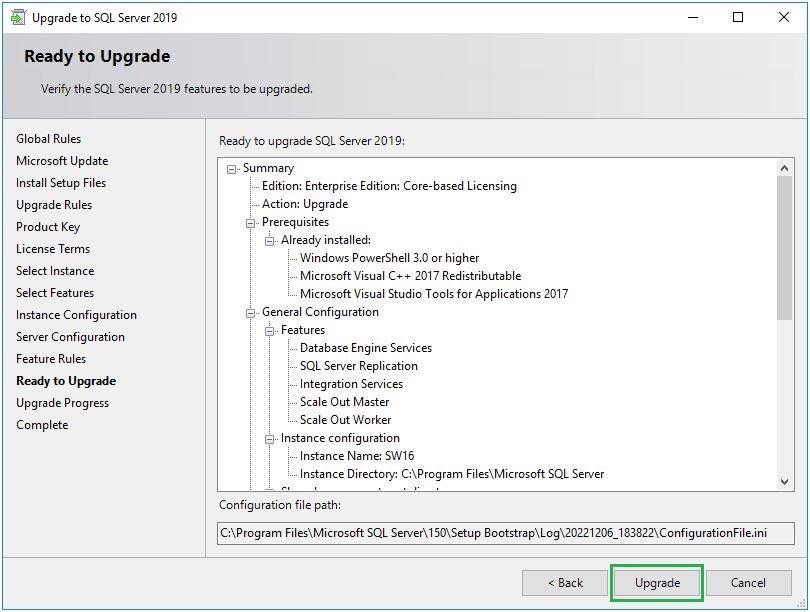
14. On this page, the wizard will display a summary of all the settings that we select in all the previous screens along with other information like prerequisites, installed components, etc. It is better to read the details and confirm that the information is correct. Once you are sure, click on the upgrade button to start the installation and upgrade process.
15. The next screen will show you the upgrade status. Once the upgrade process is successful, you will see a list of components installed successfully with a green icon as shown in the below screenshot.
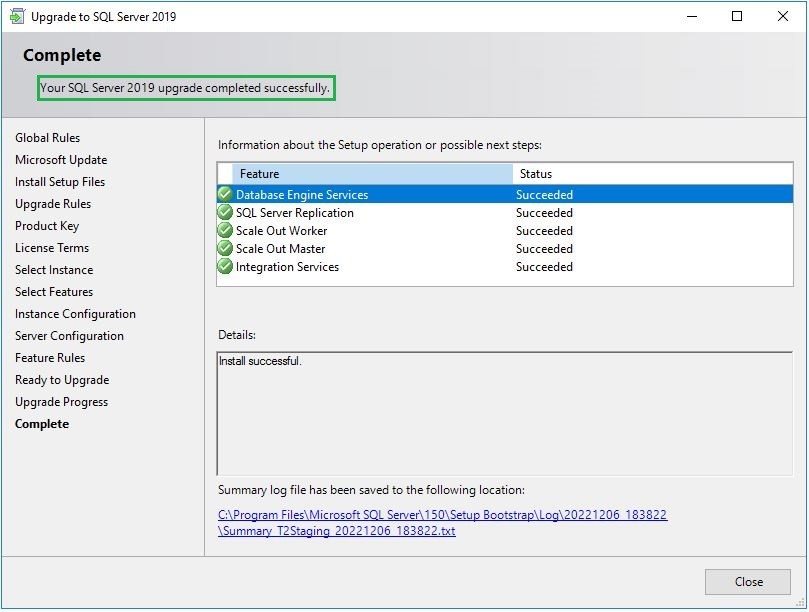
16. You will get the success message for the upgrade, click on the close button and confirm that the SQL instance upgrade is successful.
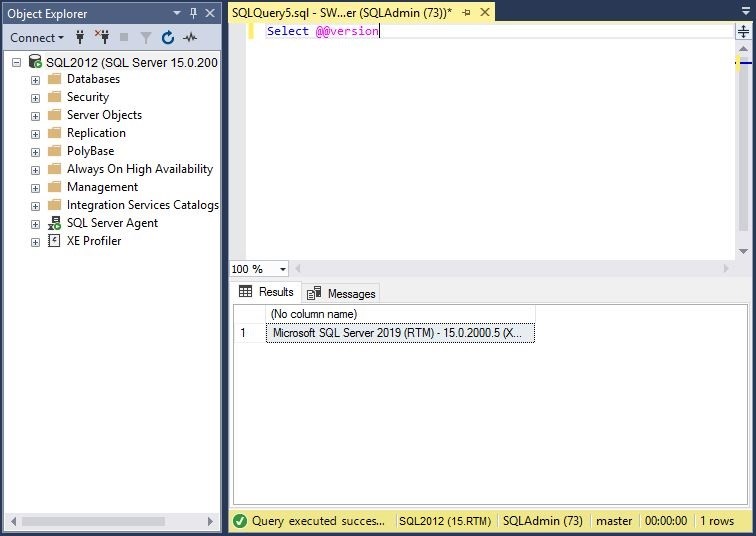
As you can see in the above screenshot, the SQL instance SQL2012 upgrade to SQL Server 2019 is successful.
Conclusion
In this article, we shared the steps to upgrade SQL 2012 to 2019 using in-place upgrade method. We applied these steps on the named SQL Instance SQL2012. As mention above, this article is about upgrading SQL Server 2012 to SQL Server 2019, you can apply these steps to upgrade SQL Server to the latest version or any other versions as well. The important point is to make sure that the version you want to upgrade is eligible as per the supported versions listed in the Microsoft website, discussed at the beginning of this article.
This article is about upgrading standalone SQL Server Instance. If you need to upgrade the multiple node Always ON Availability group SQL Server environment, then you can refer to this article.